Before you begin
1. Requirements
- Apple Vision Pro running visionOS 26.0 or later.
- A 64-bit PC running Windows 10 22H2 or Windows 11.
- The SpatialDesk Windows host and SpatialDesk companion app for visionOS.
- At least a 4-core Intel Core i5 or AMD Ryzen 5 class processor, 8 GB RAM, a DirectX 11 GPU, and 3 GB of free storage.
- The PC and headset connected to the same trusted private IPv4 network.
Recommended: Windows 11, 16 GB RAM, a current GPU with hardware H.264 or HEVC encoding, a wired Gigabit Ethernet connection for the PC, and clean Wi-Fi 6E or Wi-Fi 7 for Apple Vision Pro.
Installation
2. Install SpatialDesk
Windows PC
- Install SpatialDesk from its Microsoft Store listing.
- Open SpatialDesk from the Start menu.
- If Windows requests network access, allow it on trusted Private networks. Do not enable access on public networks unless your administrator requires it.
- Keep SpatialDesk running while using the headset. Closing the main window leaves the host available in the notification area; choose Exit from the tray menu to stop it completely.
Apple Vision Pro
- Install the SpatialDesk companion app for visionOS.
- Confirm that Apple Vision Pro is connected to the same private network as the Windows PC.
- Open SpatialDesk and allow local-network access when visionOS asks.
Discovery and routing
3. Prepare the private network
- In Windows network settings, set the active home or business network profile to Private.
- In SpatialDesk, open Network Routing and select the interface that reaches Apple Vision Pro. Usually this is the PC's Ethernet or Wi-Fi adapter.
- Avoid guest Wi-Fi, VPN routing, client isolation, and mesh-network hops between the PC and headset.
- If a managed firewall blocks discovery, allow TCP 19842 and 19843 plus UDP 5353 on the Private profile.
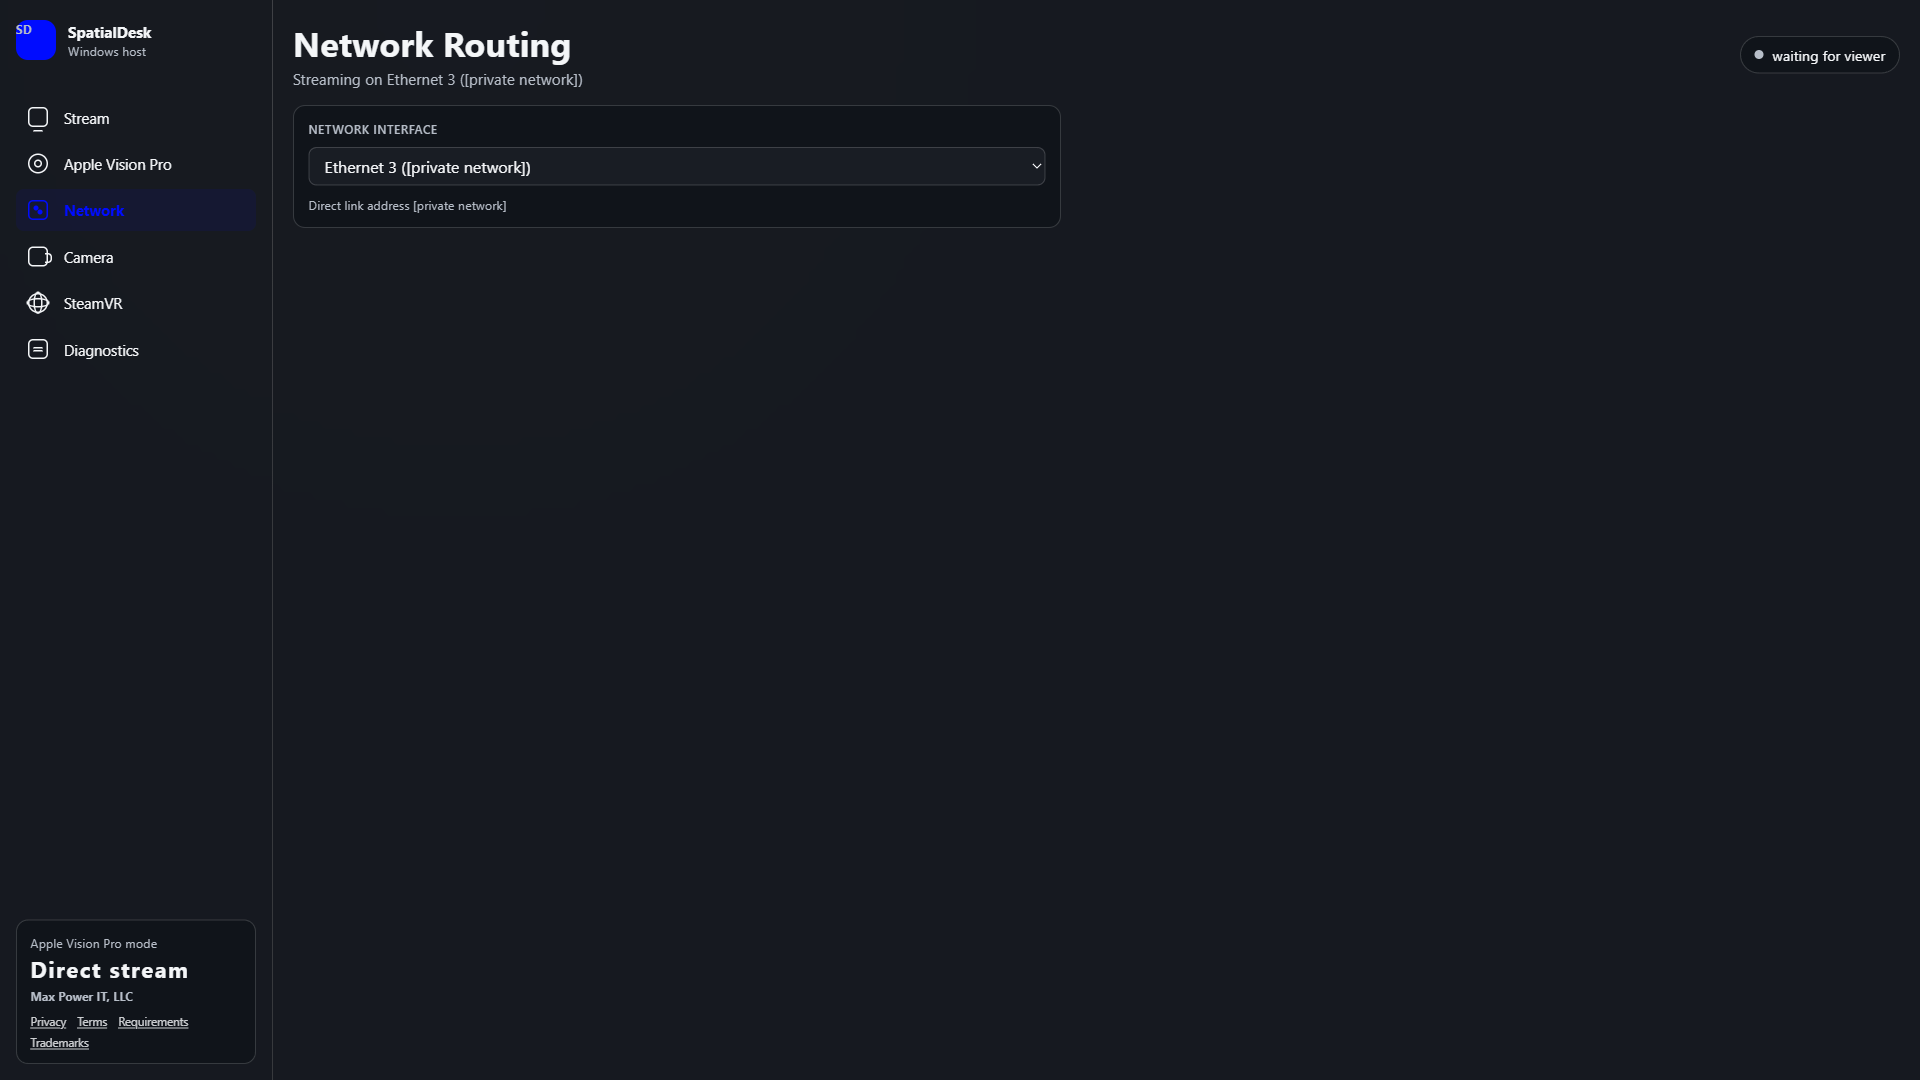
Secure connection
4. Pair Apple Vision Pro
- Open Apple Vision Pro Devices in the Windows host. A six-digit pairing code appears automatically.
- Open SpatialDesk on Apple Vision Pro and select the discovered Windows computer.
- Enter the six-digit code shown on Windows.
- Approve trusted-device access if you want faster reconnects on the same private network. You can remove trusted access later from the Windows host.
PC not listed? Confirm both devices use the same IPv4 subnet, select the correct interface in Network Routing, disable VPN routing temporarily, and verify that wireless client isolation is off.
Desktop streaming
5. Select and stream Windows applications
- In the Windows host, open the window-selection view.
- Select the Windows application window you want to share. SpatialDesk enumerates visible windows but captures only the selected source.
- Start the stream, then open the selected source from the paired headset.
- Leave the source application open and visible to Windows. Minimized, protected, or hardware-overlay video windows may not provide usable frames.
- Only one active headset viewer is supported per Windows host.
Optional webcam window
Enable Webcam feed and select a camera to send a second video track that appears as a floating window on Apple Vision Pro. Camera availability and permission are controlled by Windows.
Interaction
6. Pointer, scrolling, keyboard, and clipboard
- Point: Direct the SpatialDesk pointer at the desired location in the streamed window.
- Click: Pinch and release over the target.
- Scroll: Pinch and drag vertically or horizontally. SpatialDesk converts the gesture into Windows wheel input.
- Keyboard: Choose Focus keyboard in the headset viewer before using a connected hardware keyboard.
- Clipboard: Use the explicit clipboard controls to read from or write text to the Windows clipboard. Clipboard content is not transferred automatically.
Held-button drag-and-drop and IME text composition are not currently implemented.
Low-latency setup
7. Improve resolution and reduce stutter
- Connect the Windows PC to the router or access point with Gigabit Ethernet.
- Use a clean 5 GHz, 6 GHz, Wi-Fi 6E, or Wi-Fi 7 connection for Apple Vision Pro, ideally in the same room as the access point.
- Install the latest production GPU and network drivers.
- Check Diagnostics for hardware video encoding enabled. Software encoding can reduce resolution and increase latency under CPU load.
- Close background downloads, cloud synchronization, recording software, and other high-bandwidth or GPU-intensive applications.
- Avoid VPNs, guest networks, client isolation, and additional mesh hops.
Performance varies with the captured application, source resolution, GPU encoder, graphics driver, and network conditions.
Privacy-preserving support
8. Review and export diagnostics
- Open Diagnostics in the Windows host.
- Review discovery, signaling, viewer, and hardware-encoding events.
- If support needs a copy, choose the export action and read the acknowledgement.
- After acknowledgement, SpatialDesk copies an anonymized text file to the Windows desktop.
- Review the file, then manually submit it through the diagnostic-log support tab if desired.
SpatialDesk retains only the most recent five minutes of diagnostic events and overwrites older entries. It does not automatically upload analytics, telemetry, or diagnostic logs.
Optional capability
9. Use immersive XR Beta
The XR workflow is optional and is not required for core Windows application-window streaming.
SteamVR games through ALVR
- Install Steam and SteamVR on Windows.
- Install a compatible ALVR client for visionOS separately on Apple Vision Pro.
- Open SteamVR & Browser XR in SpatialDesk and choose Start ALVR + SteamVR.
- Open ALVR on Apple Vision Pro, select the Windows computer, and approve the headset in ALVR Dashboard on the first connection.
- After SteamVR shows the headset as connected, start a compatible SteamVR title.
Browser WebXR
- Connect ALVR and SteamVR first.
- Enter a compatible HTTPS WebXR address in SpatialDesk. Localhost development pages may use HTTP.
- Launch the browser from SpatialDesk. It uses a dedicated Chrome or Edge profile with the SteamVR OpenXR runtime supplied for that browser process.
SpatialDesk does not replace the system-wide OpenXR runtime. XR Beta compatibility varies by title, browser experience, SteamVR release, and supported OpenXR extensions.
Maintenance
10. Update or uninstall
Update
Microsoft Store builds update through the normal Microsoft Store update process. Keep Windows, visionOS, GPU drivers, and the SpatialDesk companion app current.
Uninstall
- Exit SpatialDesk from the notification-area icon.
- Open Settings > Apps > Installed apps.
- Find SpatialDesk and choose Uninstall.
The Microsoft Store package does not install a kernel driver or Windows service. The optional bundled ALVR component is a user-mode SteamVR driver used only by the XR Beta workflow.
Still need help?